Optimizing Productivity: A Step-by-Step Guide to Setting Up a Build Bot with Slack and AWS CodeBuild for Seamless Workflow

Over the past few years, I've dedicated my efforts to crafting and deploying applications that have successfully gone live. While my expertise initially centered around web development, I'm now steering my focus towards the realms of scalability and cloud infrastructure. I welcome the opportunity for engaging discussions—whether it's to challenge my perspectives or delve into any of my varied interests, such as comics, classical music, games, or anime. Feel free to reach out, and let's connect for stimulating conversations. Looking forward to crossing paths with you!

Why?
Continuous Integration and Continuous Delivery/Continuous Deployment a.k.a CI/CD; this ain’t it.
…
CI/CDs are great - update a branch through merge, perform a commit or a PR and the build request is sent instantly. A build is made and sent to you without you having to do anything out of the flow.
But what if you need a particular build from a made through the source of a particular branch or at a specific commit and the ones that fall between a version change?
You cannot enable CI/CDs on every branch. It may as very well be a waste of resources. So, we have proposed a CLI tool using capabilities of Slack and AWS. A command that can get you what you want, when you want it.
TL;DR
Setup Slack
Make a Slash Command
Make an Incoming Webhook
Setup Lambda
Create Lambda
Setup Trigger Lambda
Setup Notification Lambda
Setup CodeBuild
Configure Source
Configure Artifacts
Configure Amazon Simple Notification Service (SNS)
How?
According to our requirements, we needed a way to build an android app with different build variants, different branches, and due to a sub-module in flutter, a sub-module branch parameter was added.
You may add parameters according to your needs. These are just parameters that we required for our build.
Setup Slack
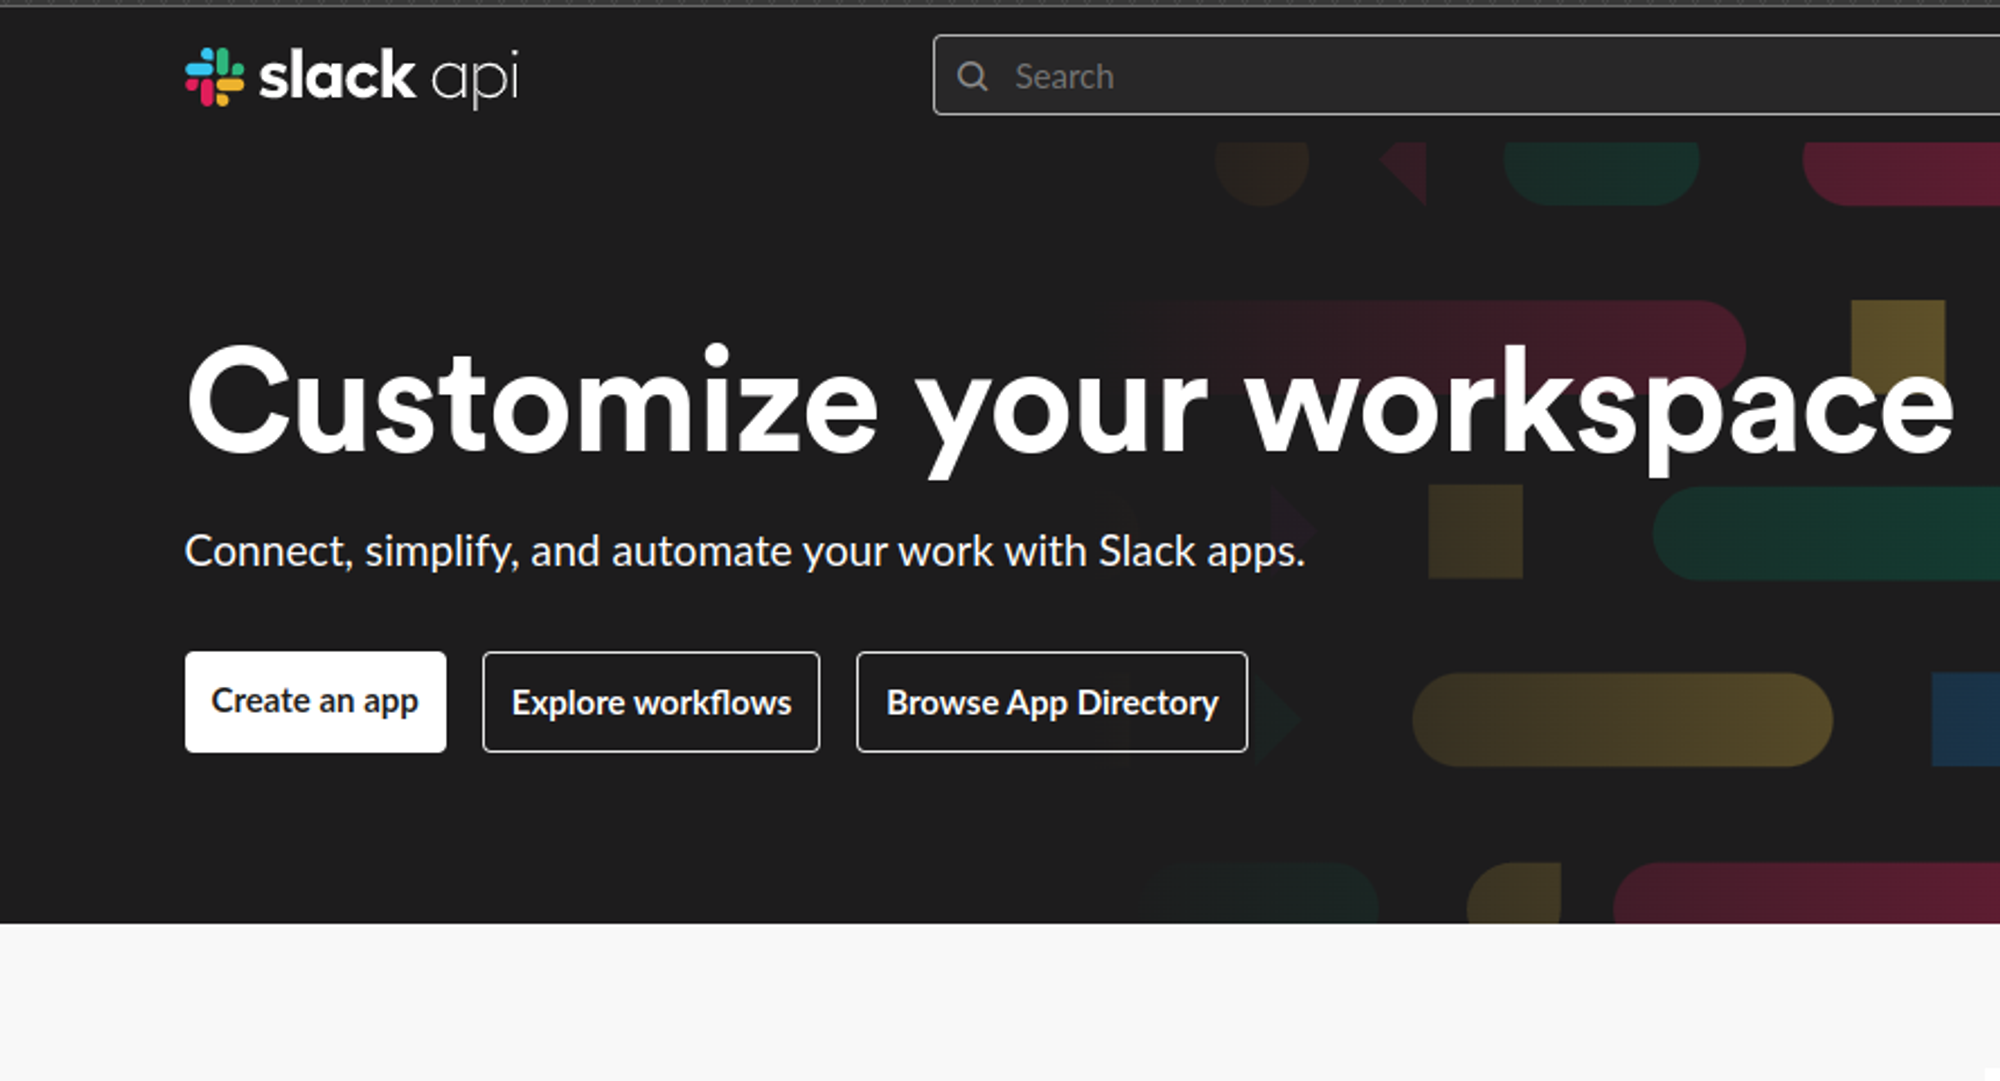
Make sure you are signed-in properly. Now go to https://api.slack.com/.
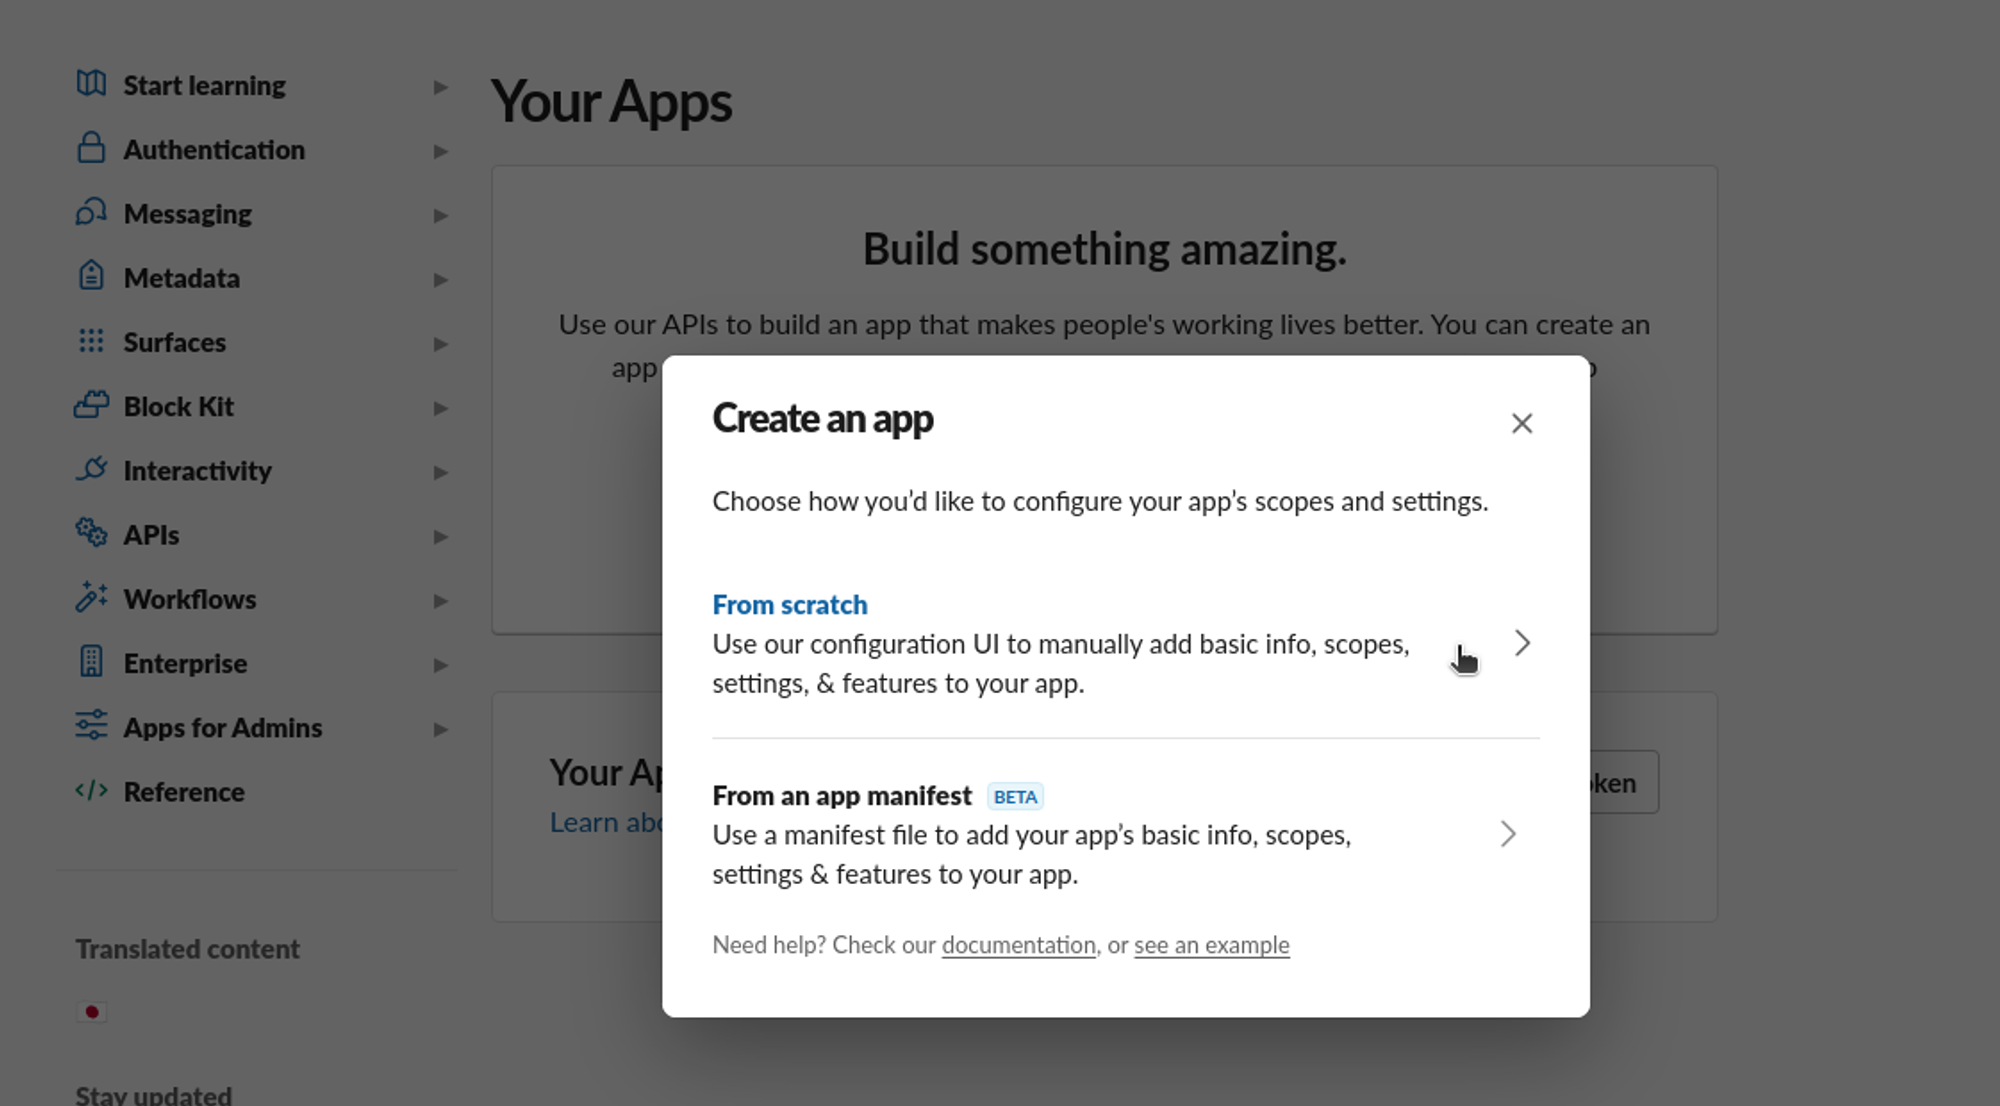
Click on Create an app (if you don't have one already)
Click on From scratch and enter your app details
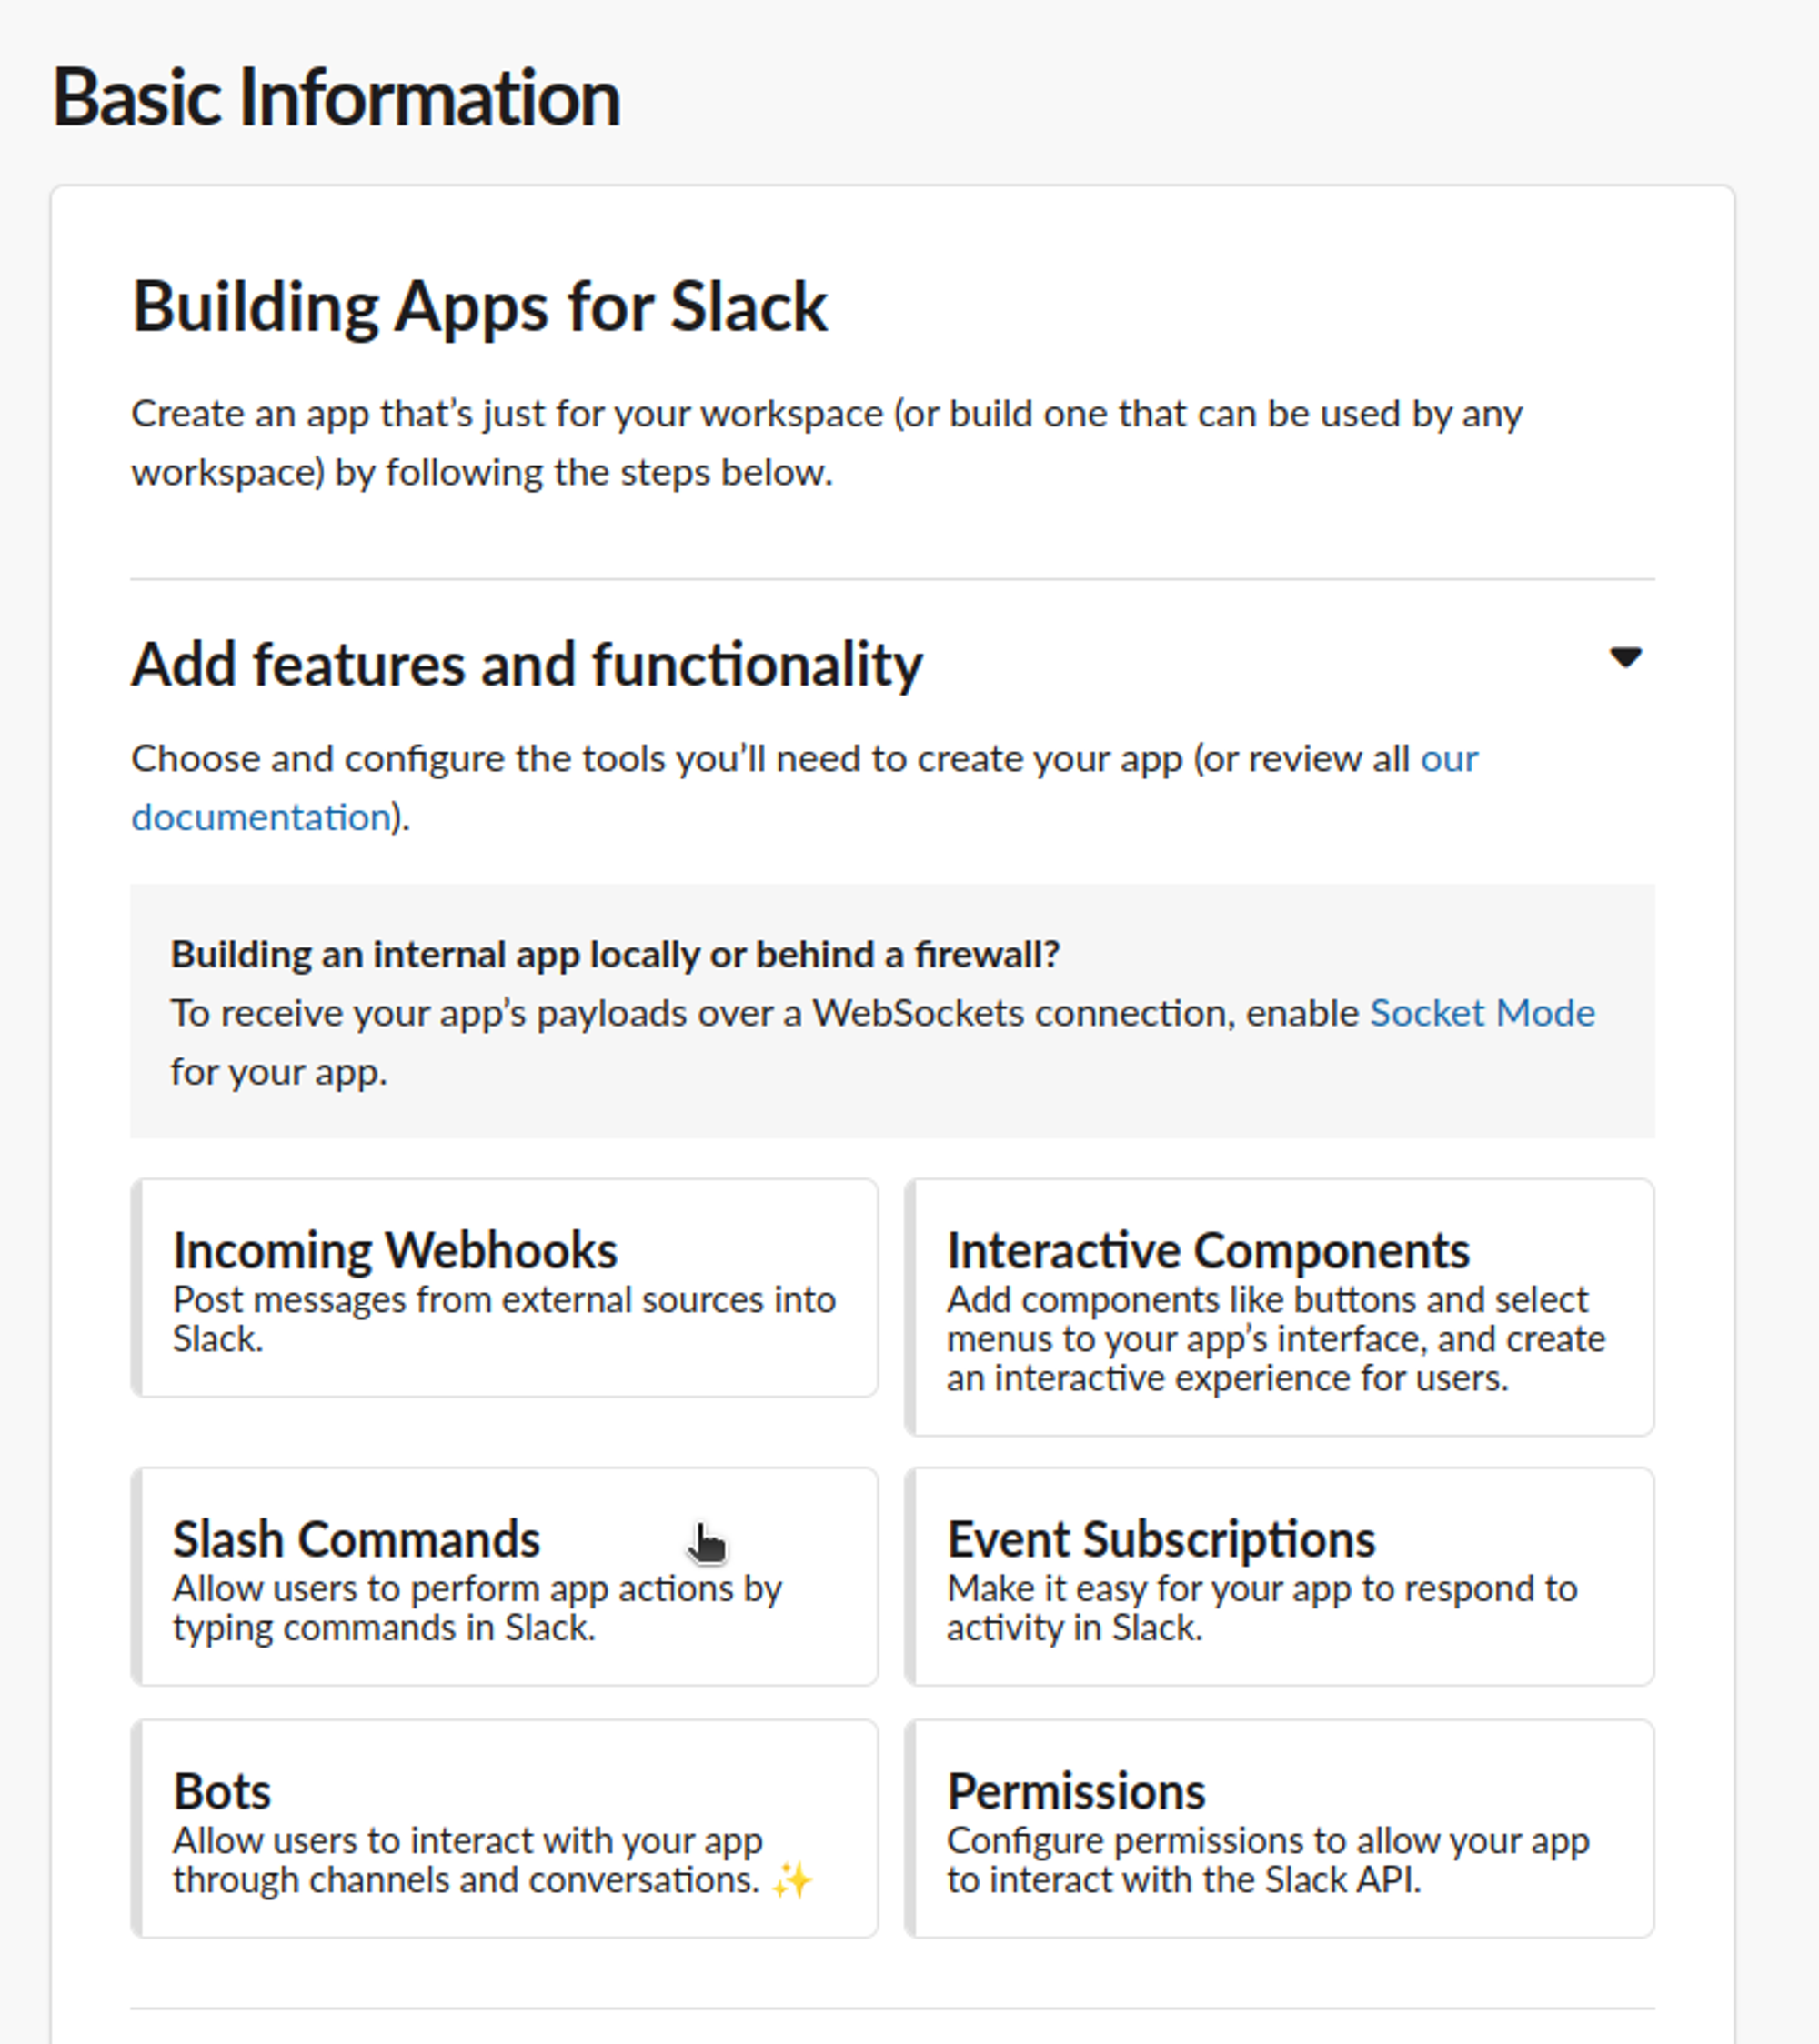
Make a Slash Command
Click on Slash Command and Create New Command
Add the required details and click on Save
Note: The request URL is a POST request so make sure the API Gateway is properly configured.
Make an Incoming Webhook
Click on Slash Command and Create New Incoming Webhook
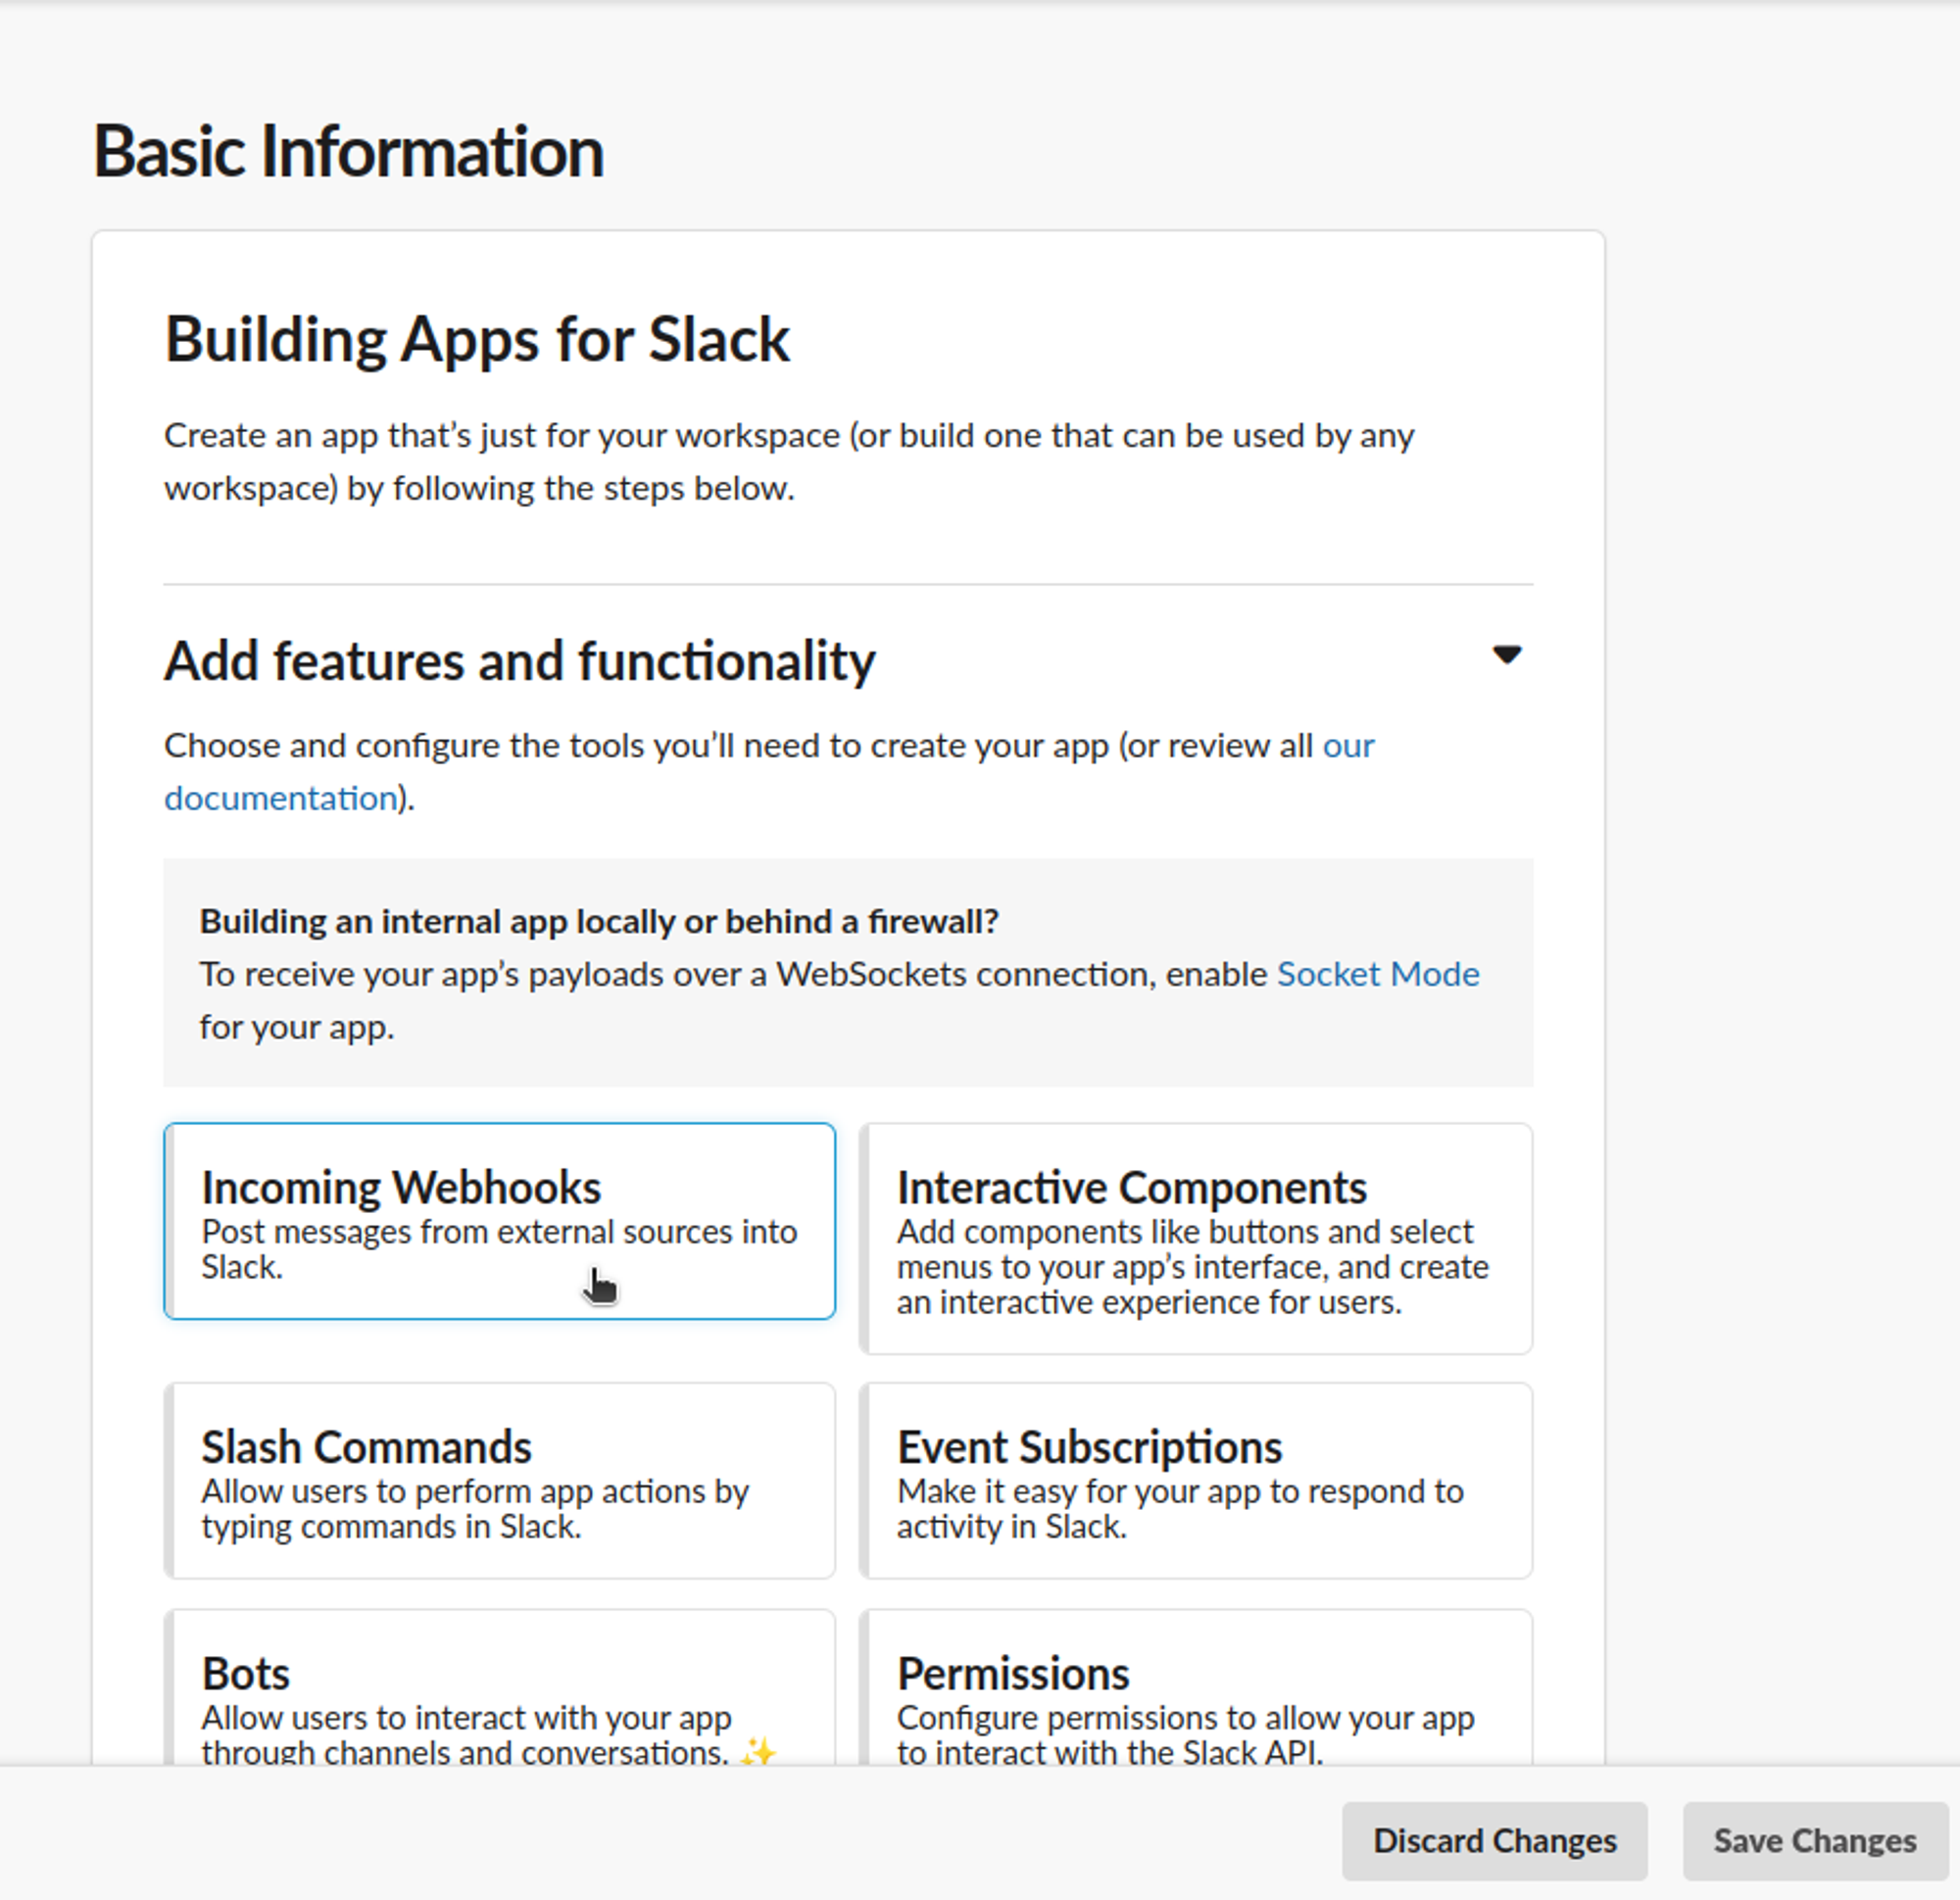
Activate Incoming Webhooks
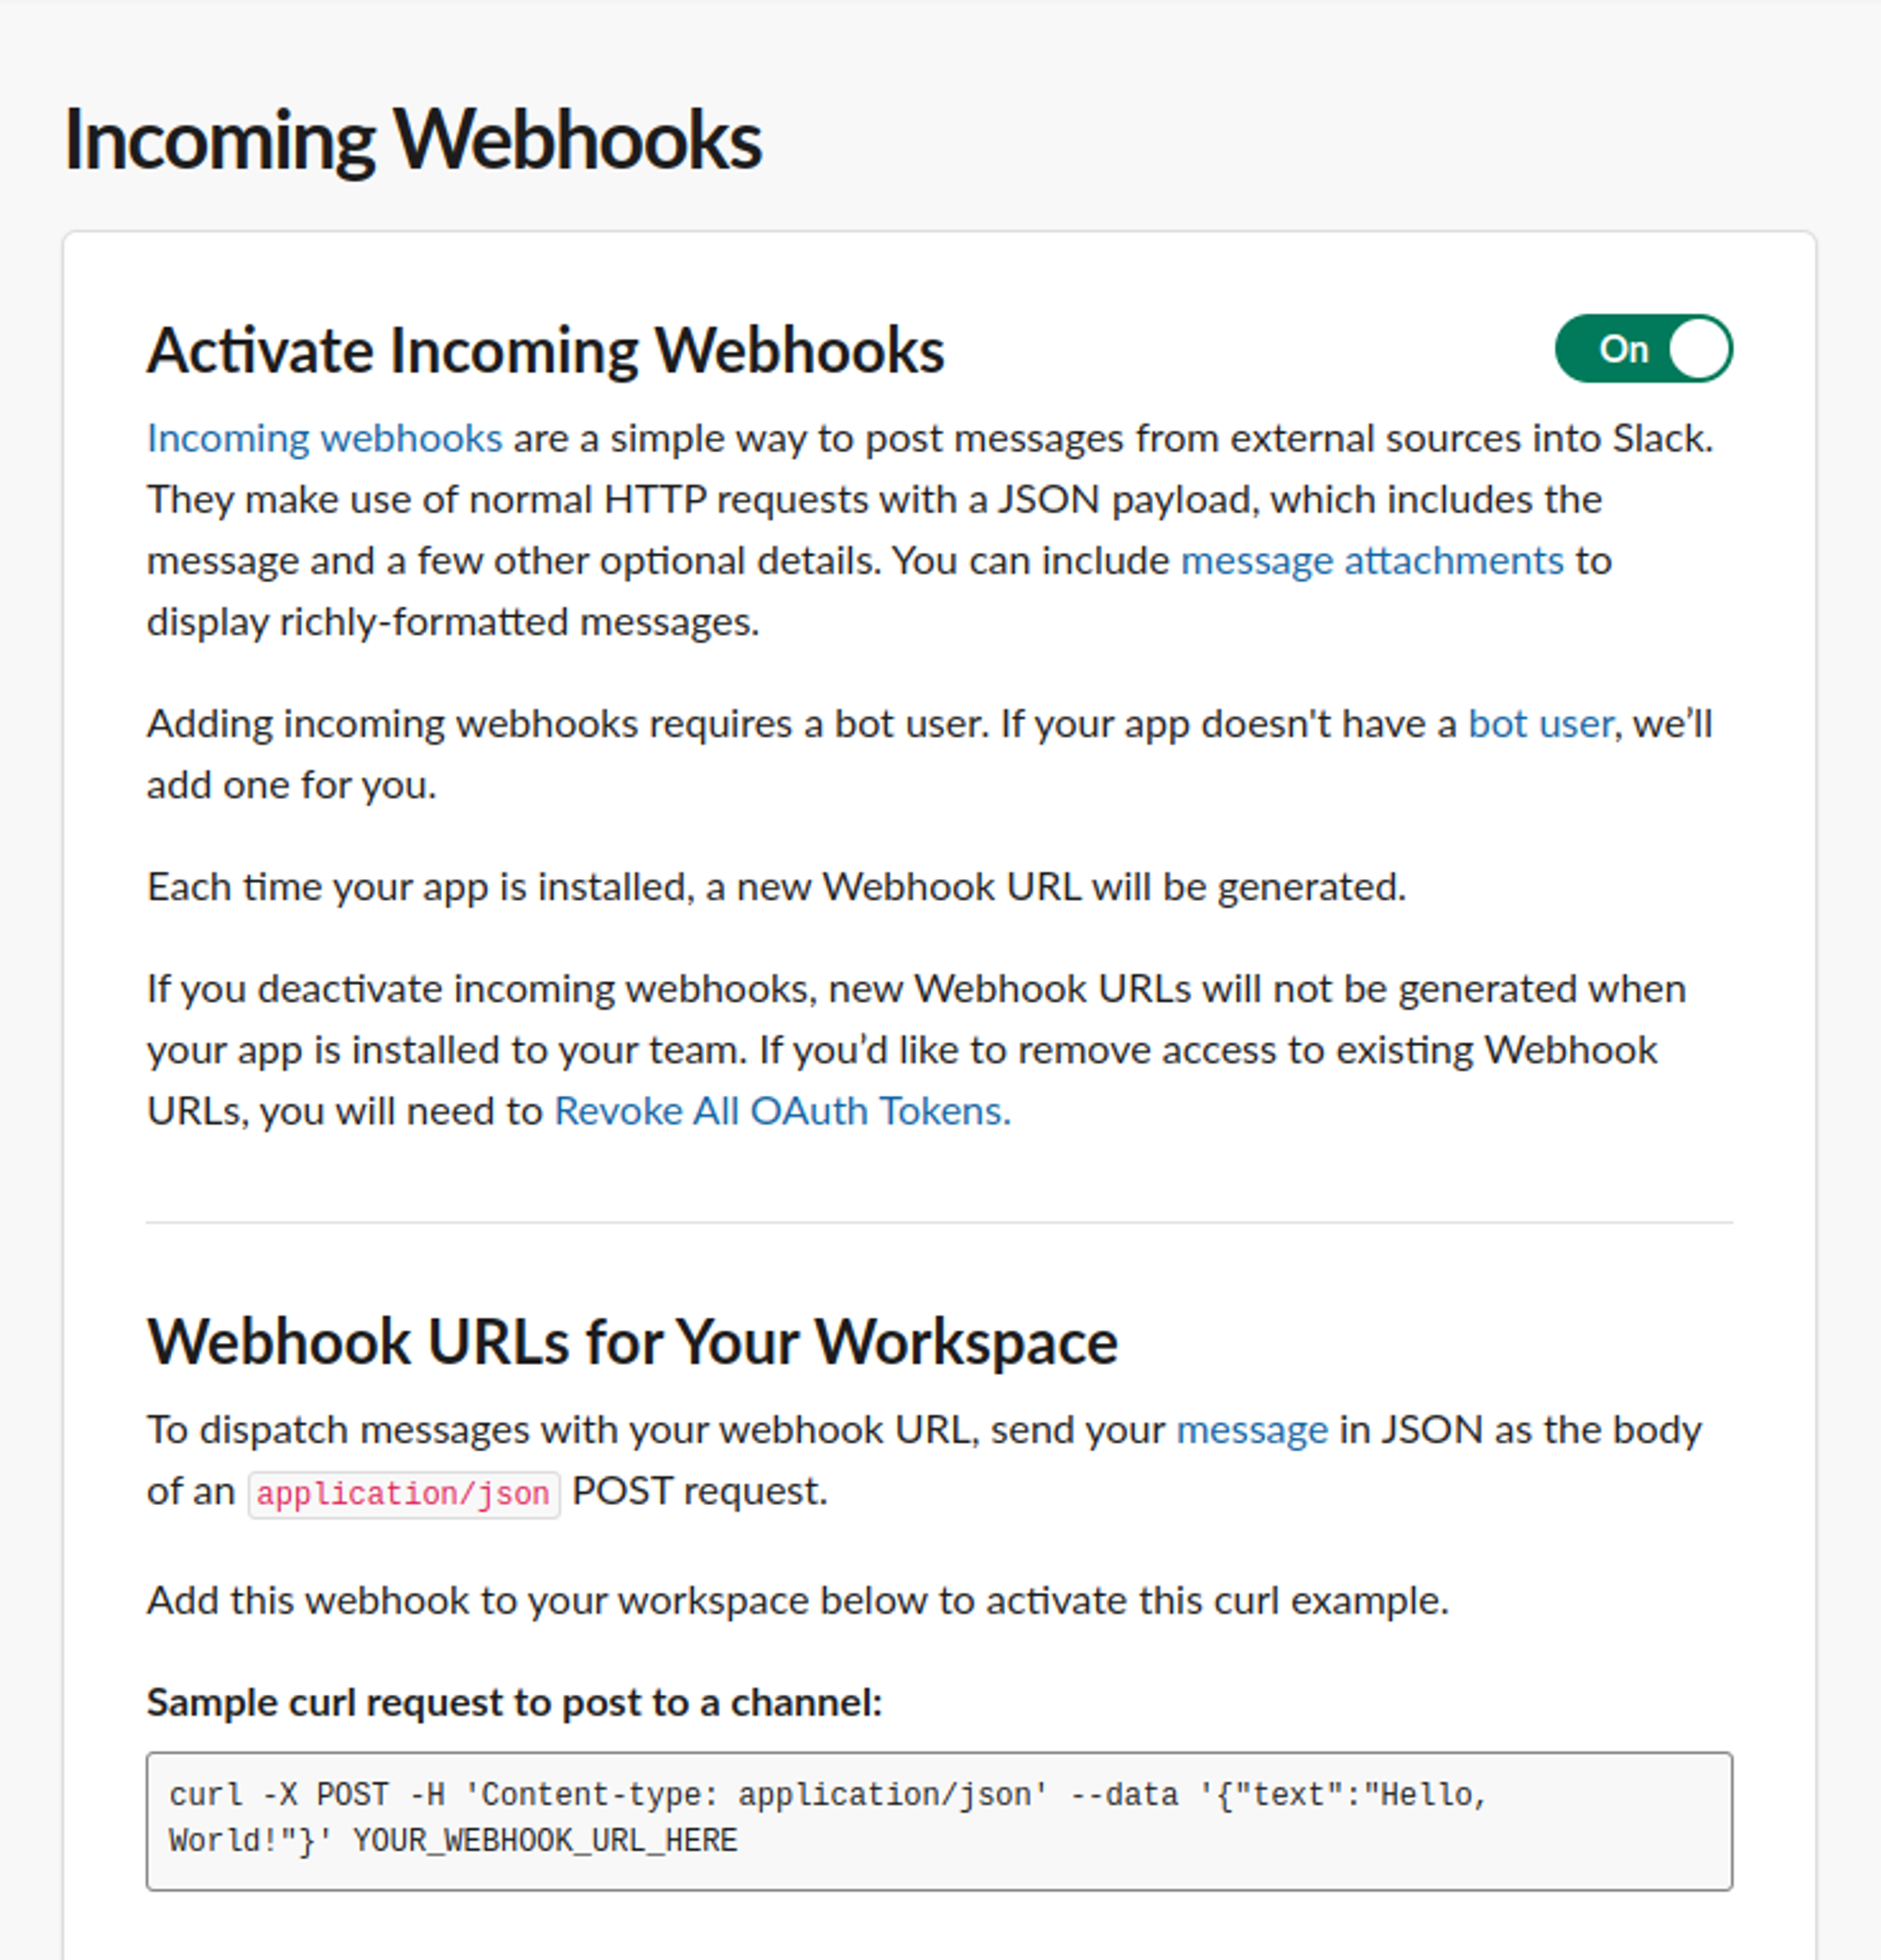
Request to Add New Webhook at the bottom of the page. Send a request with a message that states the purpose of the Incoming Webhook and inform your admin.
Select the channel that you wish to make the Incoming Webhook of and voilà! You are done.
Setup Lambda
Create Lambda
Create two lambda functions:
Trigger lambda - Used to trigger CodeBuild build
Notification lambda - Used to send a notification on Slack
Note: You may create the lambda function by referring to this documentation.
Setup Trigger Lambda
We will need an API Gateway as a trigger. You may refer to this to build an API Gateway for lambda. The endpoint should be a POST request because that's what the Slack Slash Command will provide us.
Request Schema
{
  "version": "2.0",
  "routeKey": "ANY /triggerAndroidBuild",
  "rawPath": "/default/triggerAndroidBuild",
  "rawQueryString": "",
  "headers": {
    ...
  },
  "requestContext": {
    "accountId": "...",
    "apiId": "...",
    "domainName": "...",
    "domainPrefix": "...",
    "http": {
      "method": "POST",
      "path": "/default/triggerAndroidBuild",
      "protocol": "HTTP/1.1",
      "sourceIp": "...",
      "userAgent": "Slackbot 1.0 (+https://api.slack.com/robots)"
    },
    "requestId": "...",
    "routeKey": "ANY /triggerAndroidBuild",
    "stage": "default",
    "time": "07/Jun/2022:08:00:05 +0000",
    "timeEpoch": 1654588805616
  },
  "body": "dG9rZW49NTRQZ1Z0d2NYMFBad29JQnh5cGNxaHJJJnRlY...hZjBj",
  "isBase64Encoded": true
}
We are mainly concerned with the body given to us. It will always be Encoded with Base64. All you need to do is decode the string and you will get all the information that you may require.
To understand what is stored in the body, refer to this.
Source code
Import aws-sdk in the lambda to use it and setup the CodeBuild config according to your needs. Refer to AWS CodeBuild Request Syntax.
 // index.js
 const AWS = require("aws-sdk");

 const codebuild = new AWS.CodeBuild();
   const branch = data.hasOwnProperty("branch") ?
     data["branch"] : "develop";
   const flutter_branch = data.hasOwnProperty("flutter_branch")
     ? data["flutter_branch"]
     : "develop";
   const build = {
     projectName: "android-app",
     sourceVersion: branch,
     environmentVariablesOverride: [
       {
         name: "VARIANT_TYPE" /* required */,
         value: build_variant /* required */,
         type: "PLAINTEXT",
       },
       {
         name: "BRANCH",
         value: branch,
         type: "PLAINTEXT",
       },
       {
         name: "FLUTTER_BRANCH",
         value: flutter_branch,
         type: "PLAINTEXT",
       },
       {
         name: "TRIGGER_USER",
         value: url.searchParams.get("user_id"),
         type: "PLAINTEXT",
       },
       {
         name: "TRIGGER_USER_REF",
         value: url.searchParams.get("user_name"),
         type: "PLAINTEXT",
       },
     ],
     cacheOverride: {
       type: "LOCAL",
       modes: [
         "LOCAL_CUSTOM_CACHE",
         "LOCAL_DOCKER_LAYER_CACHE",
         "LOCAL_SOURCE_CACHE",
       ],
     },
     gitSubmodulesConfigOverride: {
       fetchSubmodules: false /* required */,
     },
     buildspecOverride: `{version: 0.2, ...`,
   };
Note: We have added the buildspec required by the CodeBuild in this config itself. You may add it in the AWS console or in the source files as buildspec.yml.
Build the application using this small snippet. Once the build is successfully triggered, we can use the callback function to send a message back to Slack where the command was triggered from.
 // index.js

 try {
     const result = await codebuild.startBuild(build).promise();
     callback(undefined, {
       statusCode,
       body: ":white_check_mark: Success! triggering build for android-app.",
       headers,
     });
   } catch (err) {
     callback(undefined, {
       statusCode,
       body: `:warning: Error! ${err.message}.`,
       headers,
     });
   }
Note: You may use this callback function for command validation as well.
Setup Notification Lambda
We will need an Amazon Simple Notification Service (SNS) as the trigger. The SNS will be created later in the CodeBuild section.
Request Schema
{
  "Records": [
    {
      "EventSource": "aws:sns",
      "EventVersion": "1.0",
      "EventSubscriptionArn": "...",
      "Sns": {
        "Type": "Notification",
        "MessageId": "fa556e61-3b73-5f7c-b93d-357acabcb9eb",
        "TopicArn": "arn:aws:sns:ap-south-1:289014830182:codebuild-slack",
        "Subject": "None",
        "Message": "{\"account\":\"...\",\"detailType\":\"CodeBuild Build State Change\",\"region\":\"ap-south-1\",\"source\":\"aws.codebuild\",\"time\":\"2022-06-09T13:03:04Z\",...,\"additionalAttributes\":{}}",
        "Timestamp": "2022-06-09T13:03:11.226Z",
        "SignatureVersion": "1",
        "Signature": "DcgduZ8N2tyXh1ioMQNpah4m3/dol2...tEQ==",
        "SigningCertUrl": "https://sns.ap-south-1.amazonaws.com/....pem",
        "UnsubscribeUrl": "https://sns.ap-south-1.amazonaws.com/...",
        "MessageAttributes": {}
      }
    }
  ]
}
You will find all the CodeBuild Information in the “Message” section of the request. The Message section will be encoded in JSON string, so you will have to decode it before using any data.
The Message section will look like this.
Algorithm
Convert the Message from JSON string to Object
Format the message that you need to send to Slack using the details provided in the message. You may learn more about formatting from here.
Use the Incoming Webhook to send a POST request with the formatted message as body.
Setup CodeBuild
You will need a S3 bucket to store the artifacts produced by the CodeBuild. Refer to AWS user guide for creating bucket.
Configure Source
We used GitHub as our source. You may find other options such as:
Amazon S3
CodeCommit
Bitbucket
GitHub Enterprise Server
It’s very simple to authenticate - you just need to use the OAuth provided by the AWS console and login to GitHub. The cloning of the repository will be handled by CodeBuild (to be more specific CodeStarSourceConnection).
Configure Artifacts
Below is the simple configuration to achieve pushing the Build Artifacts on Amazon S3.
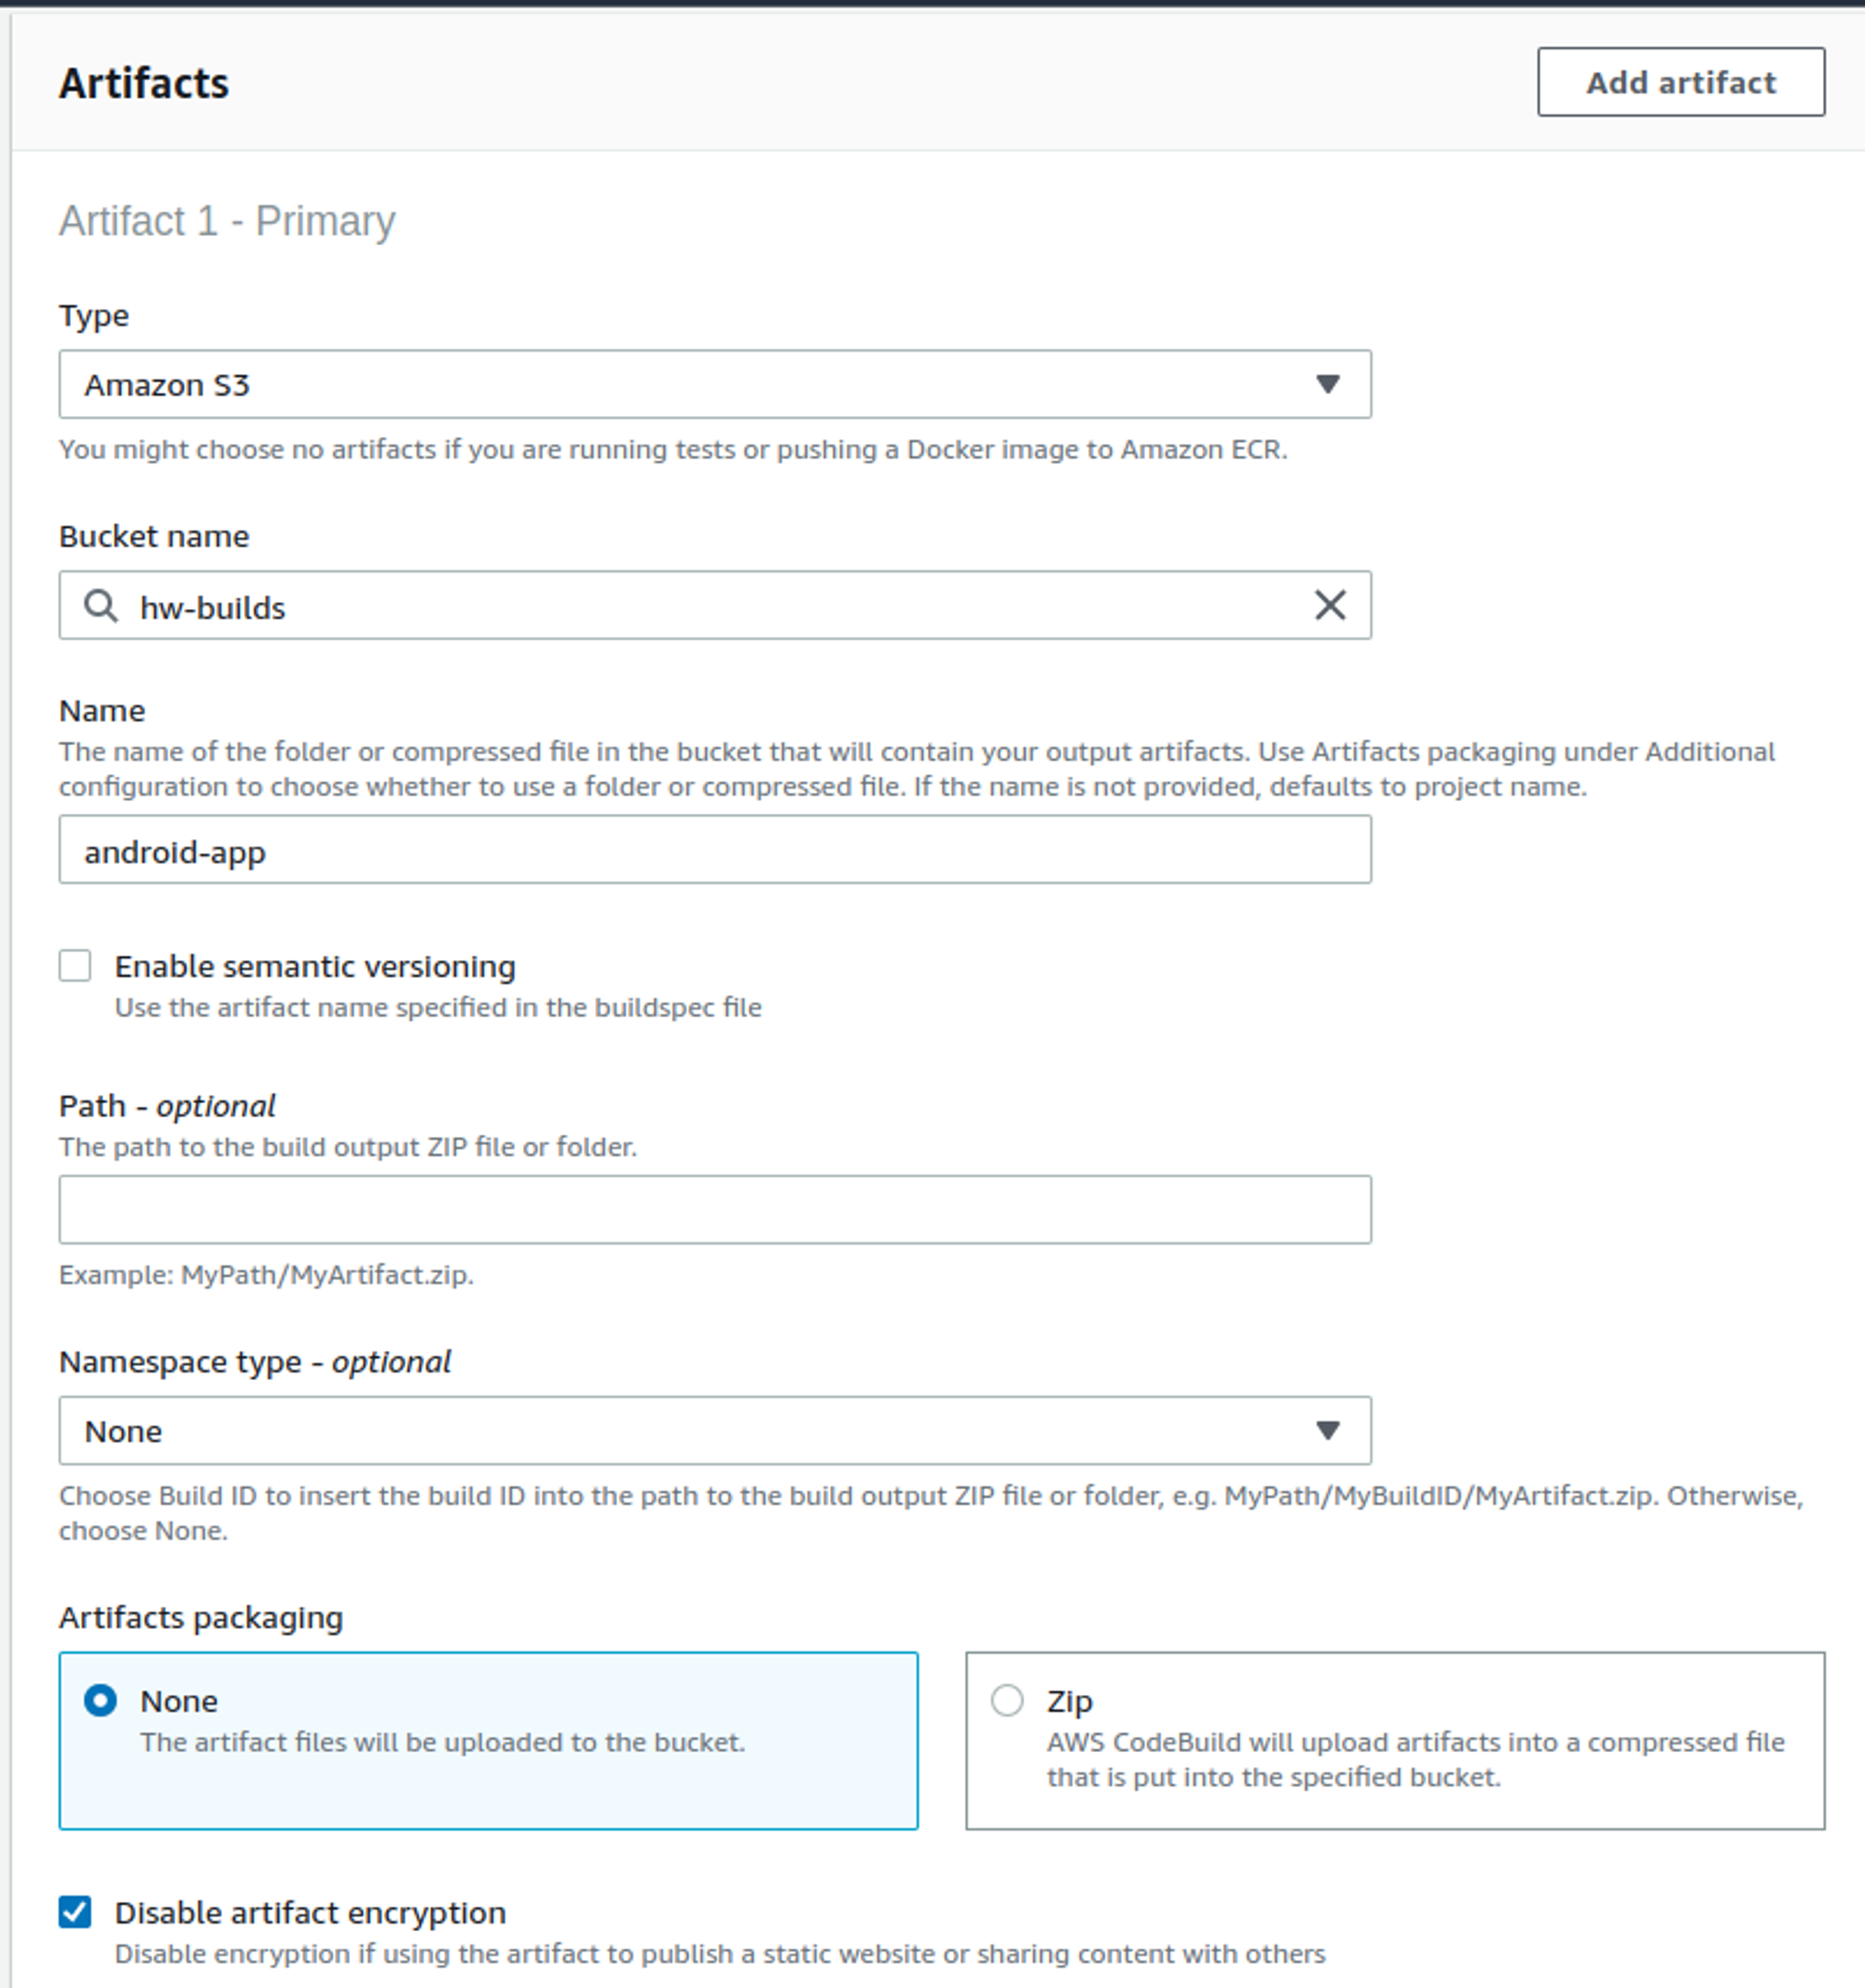
Note: Each config mentioned above matches with those of AWS CloudFormation and are all documented here by AWS.
Configure Amazon Simple Notification Service (SNS)
Create a SNS topic. You may refer to this AWS Documentation. Once you have created the SNS, you should add the Notifcation Lambda as a subscriber
Hover on Notify and click on Manage notification rule
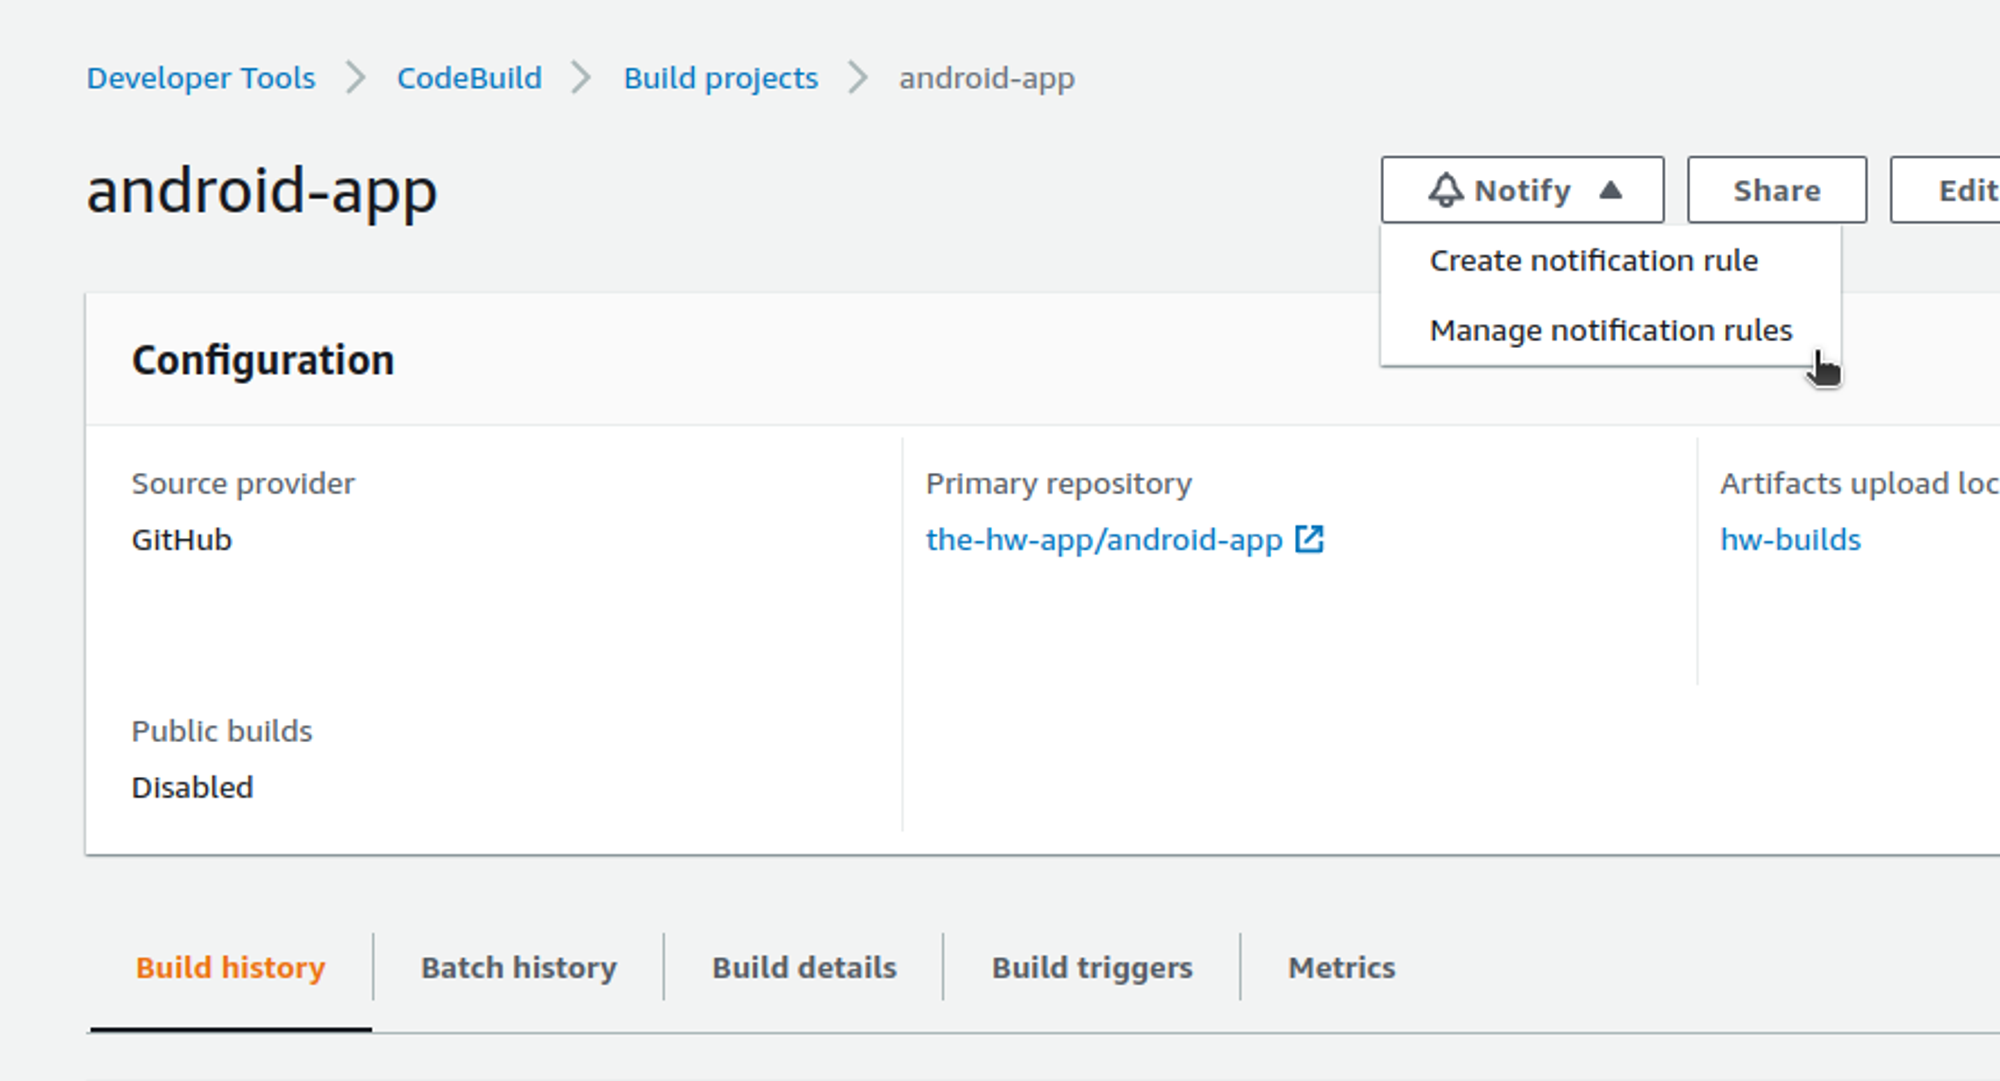
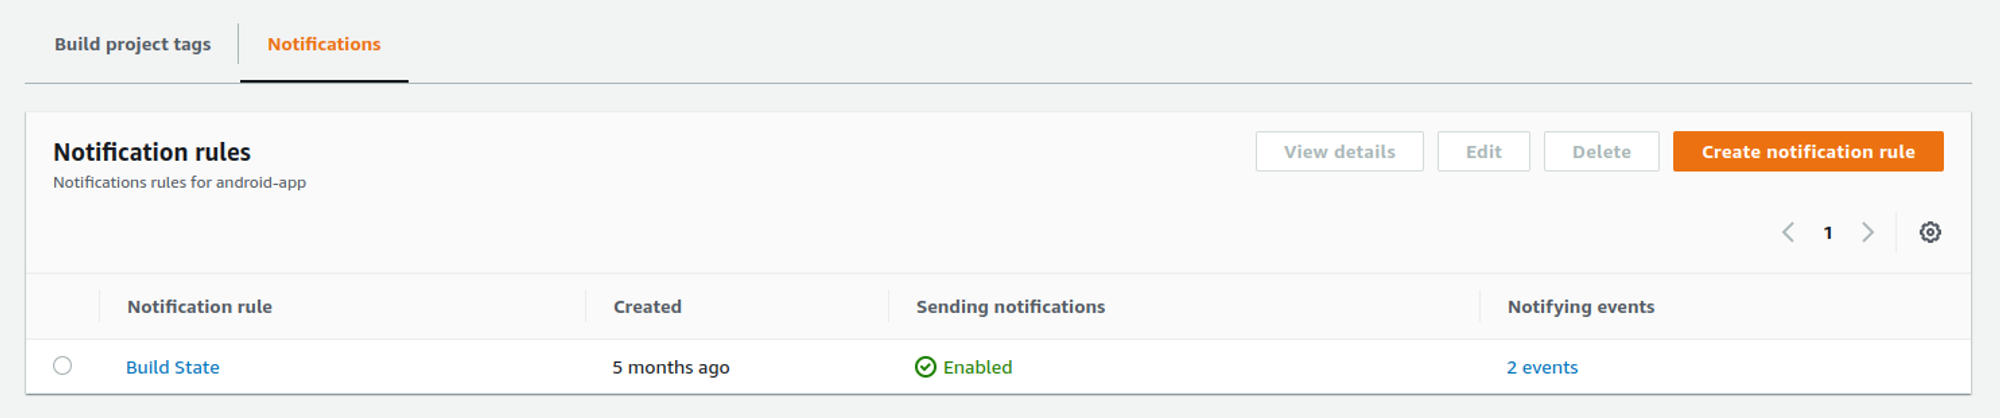
You will be redirected to this page. Here, we already have a notification rule setup but if you don’t, click on Create notification rule.
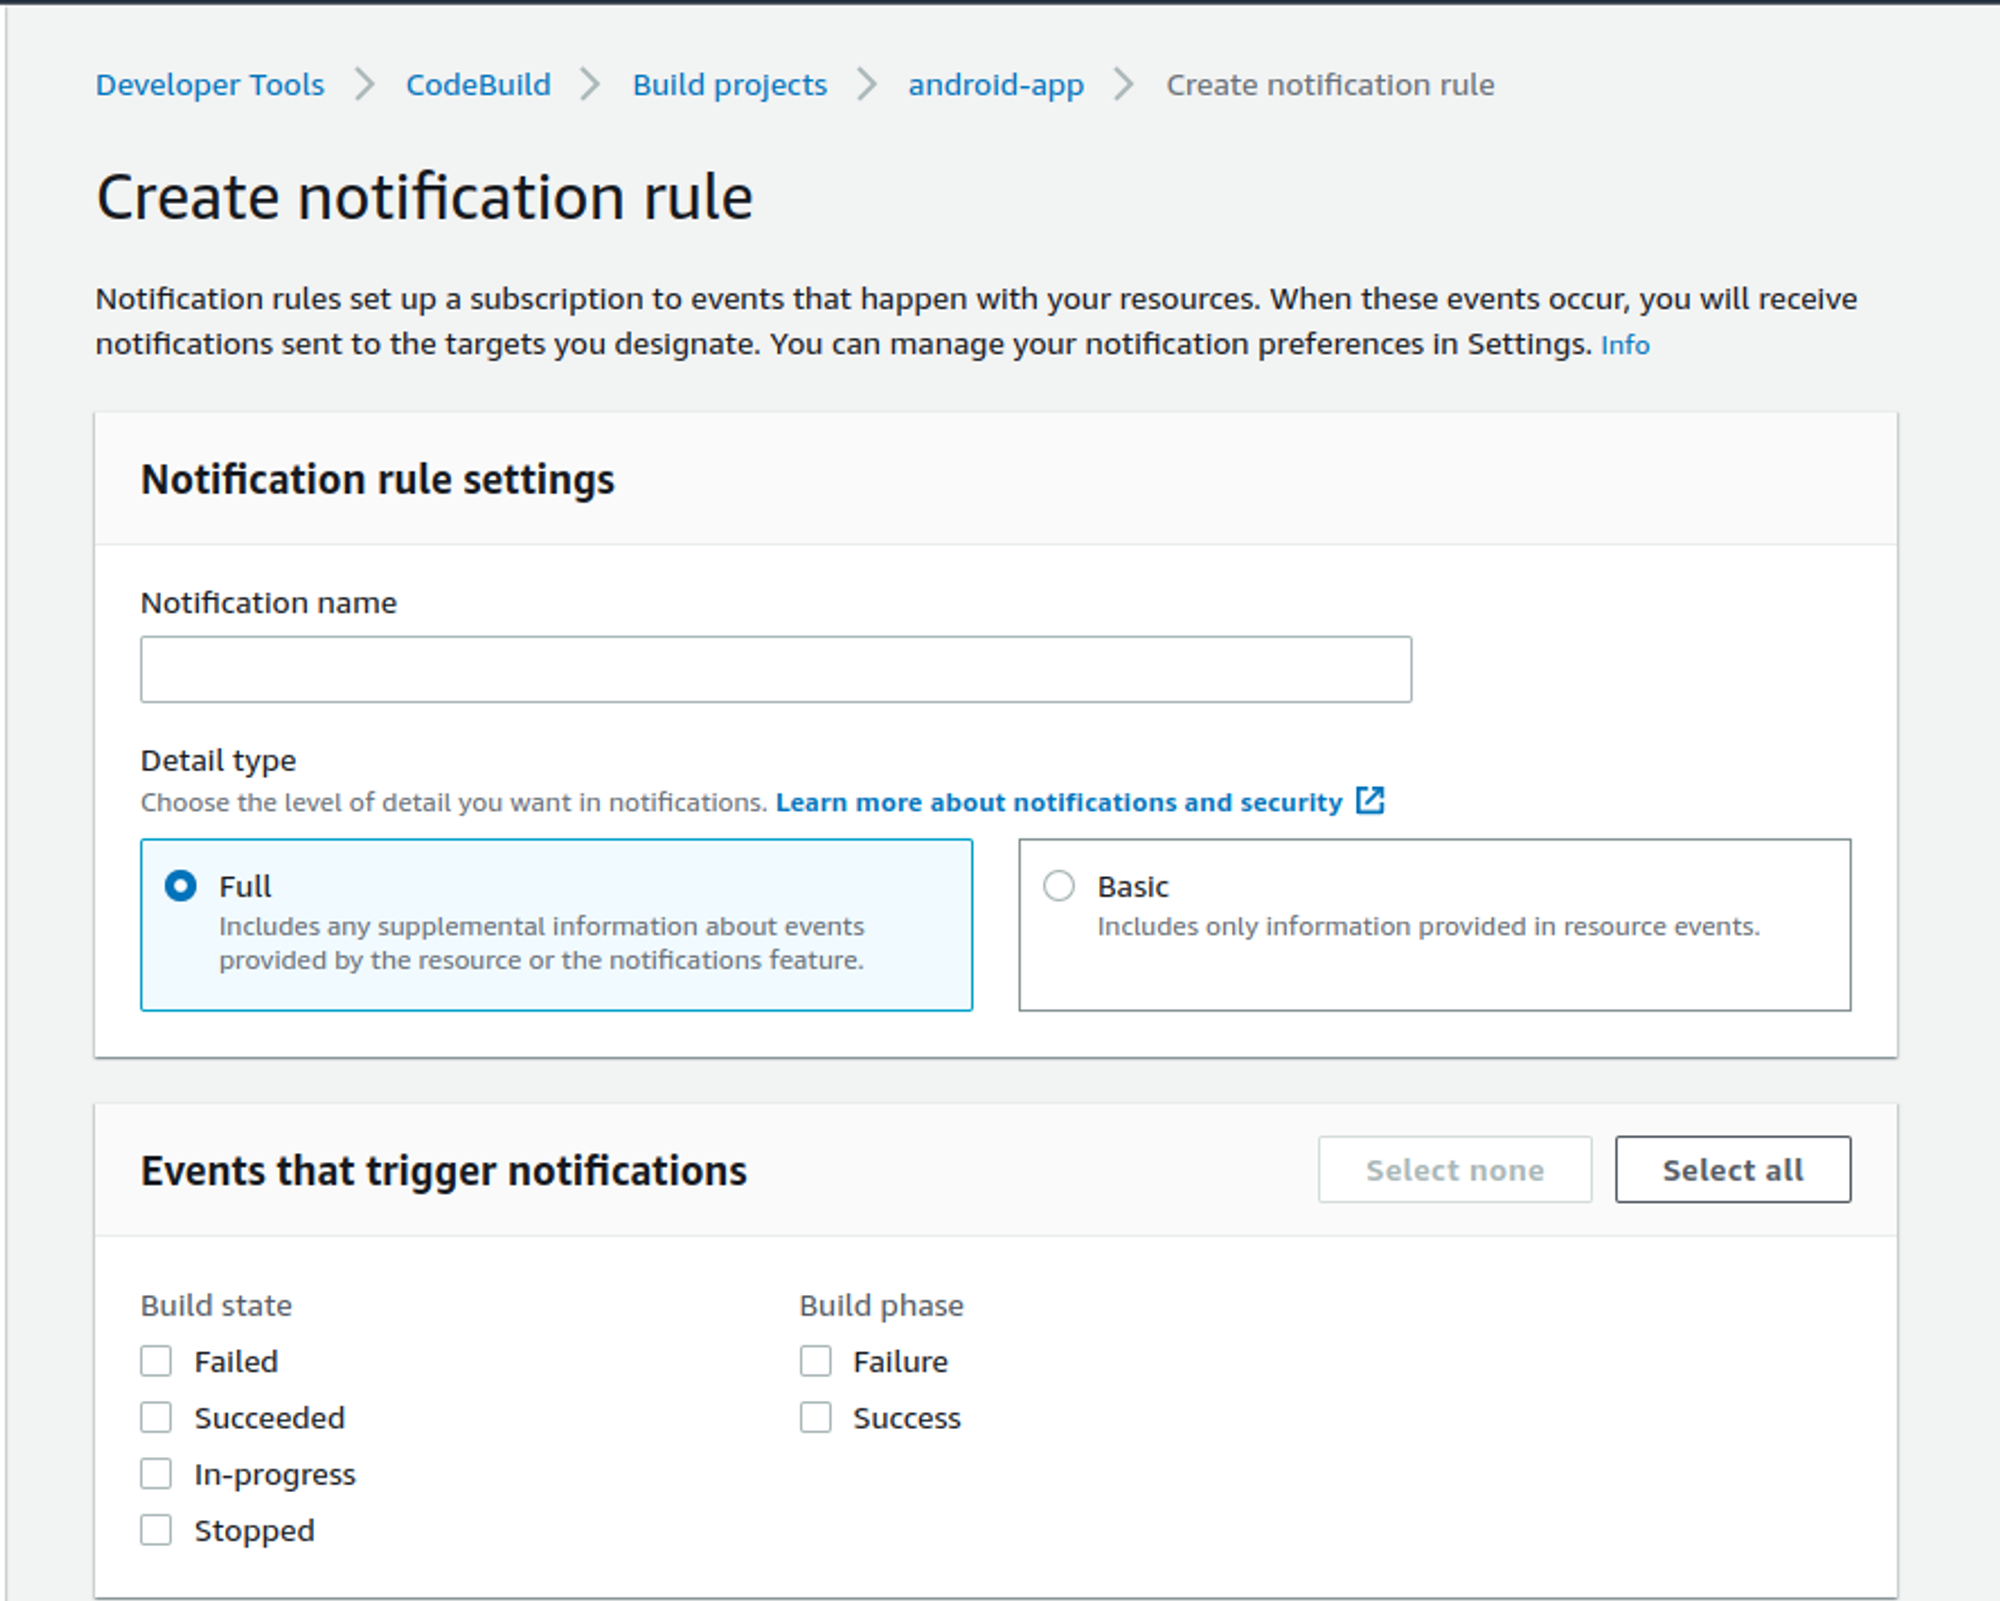
This will send you to the page below.
Enter whatever name you may seem fit
Choose detail type Full or Basic according to your needs. You may learn more about the notifications here.
Choose a trigger according to your need. We have chosen Failed and Succeeded to get notifications when the build has failed or successfully finished building.
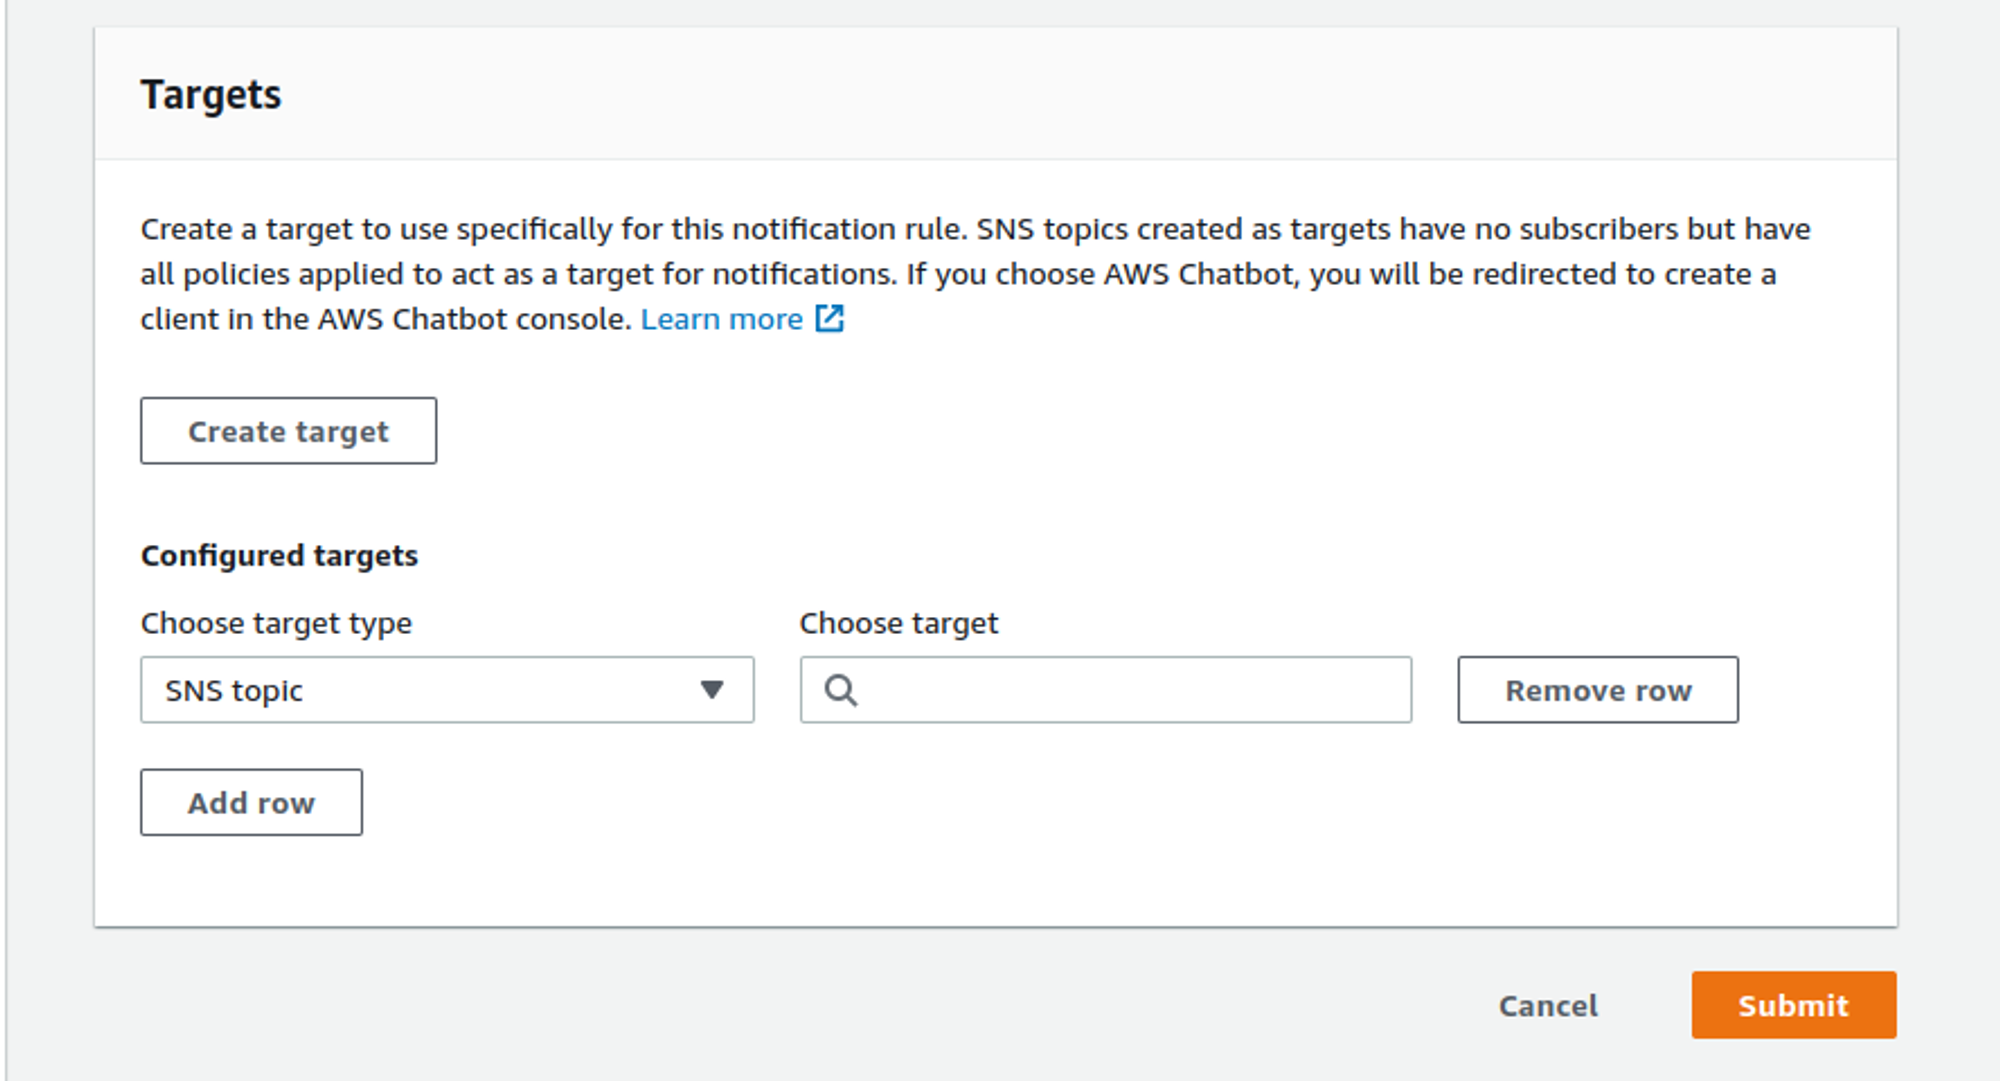
In the Targets section you may select the SNS that you just created
Note: You may refer to any of the following to create a CodeBuild build.
Conclusion
With this you can now add the bot to your slack workspace and experiment with the command that you just created.